Forced Deployment
The classical approach to updating game servers is to update them all at the same time, within a maintenance window. Clients cannot go online during this window and they will usually have to upgrade their client software in order to go online afterwards, depending on whether it concerns a compatible update or not. No game servers with different versions will exist alongside each other afterwards.
Benefits
- No extra server resources are required. The total amount of game servers will remain equal during a forced update
Downsides
- A maintenance window is required: results in a little downtime during which clients cannot play the game online. It does give your clients time to already update their client software
- No way to test your newly deployed game server versions in production. As such, testing must be done beforehand!
Patching Actions
Our platform performs several actions during the patching process. These actions can be split into configuration changes and actual deployments.
Configuration Changes
When a Patch Job starts, the Forced Deployment method will perform the following configuration changes:
- swap the old ID of the selected ApplicationBuild to the new ID, in either the game template or utility template
- disable automatic scaling on the selected Fleet(s). This is needed to prevent dynamic downscaling of all your game servers during the patching process
Instance Deployments
The following actions are performed in-order, for each individual application instance:
- download the new build
- stop instance (hard or soft with a timeout)
- remove the old build files while leaving behind any files newly generated by the instance
- deploy the new build files into the same folder as the old build
- start the instance
Pre-loading the build
5 minutes before the start time of a Patch Job, distribution of the new build towards all the hosts is begun, allowing for a shorter patching process itself.
Re-enabling your Fleets
When the Patch Job starts, we must set the operational status of all impacted Fleets to "Manual" to prevent dynamic downscaling of all your game servers during the patching process. Currently the Fleet(s) are not automatically re-enabled when a Patch Job is finished and you must re-enable your Fleets' scaling modes, if you previously had them on automatic scaling. You can do this when most of your clients have re-joined.
Maintenance window requirement
The Forced Deployment method requires a maintenance window because all instances will updated around the same time, with the option to drain instances allowing players to finish a match.
Creating a Forced Deployment Patch Job via the UI
Patch Job creation and maintenance is done via the Job Queue and Job History pages.
Step 1: Create Patch Job Instance Selection
On the Job Queue page you can see pending and running Patch Jobs. You can create a new one by clicking the  button. This opens the following multi-step wizard:
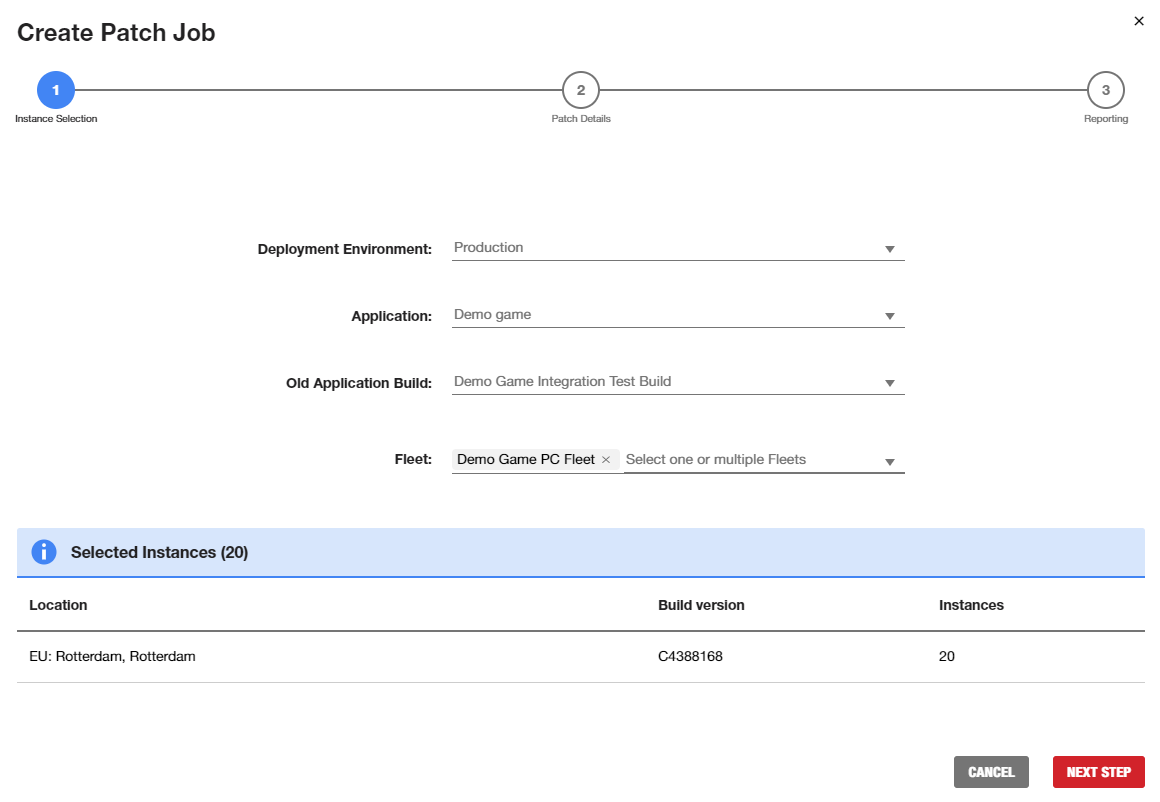
- Deployment Environment: the process will only apply to instances in this environment
- Application: the process will only apply to instances of this Application
- Old Application Build: the process will only apply to instances running this Application Build - these builds must be of the Application type previously indicated
- Fleet(s): the process will only apply to instances running in these Fleets running the aforementioned Application Build
Step 2: Configure Patch Job
The next screen asks you to provide runtime details for the Patch Job:
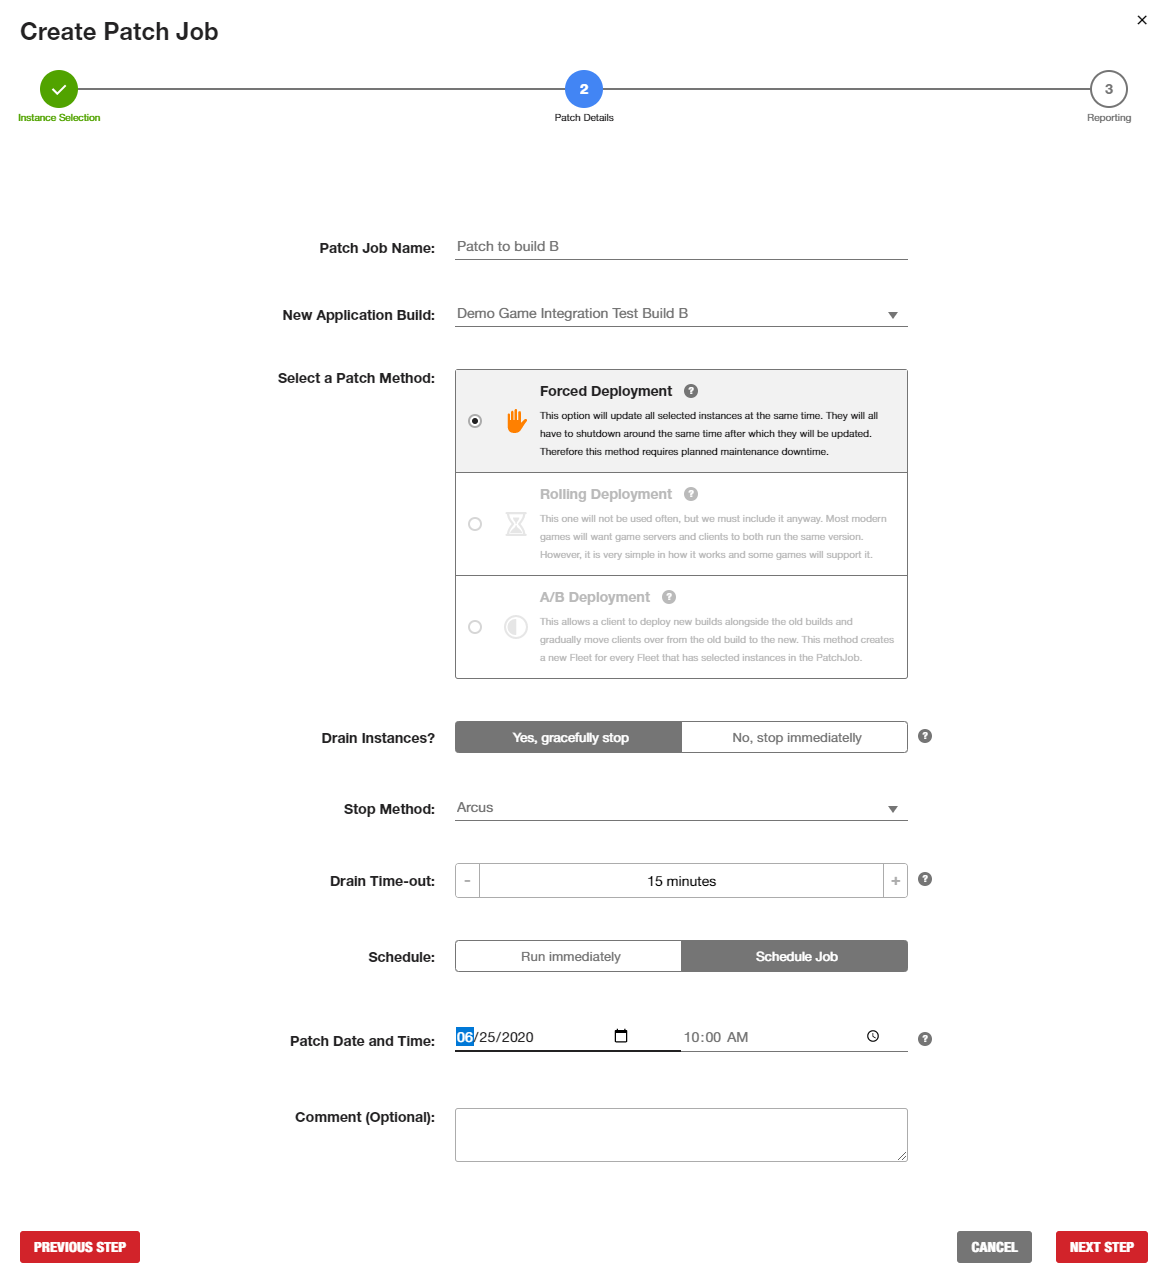
- Set Patch Job name
- Set the new Application Build to deploy
- Select patching method: Forced Deployment
- Indicate whether to drain instances
- If yes, with which timeout?
- Set Patch Job start time
- Add optional comment
Step 3: Configure Reporting
Finally you can add any email addresses that you would like us to send reporting emails towards:
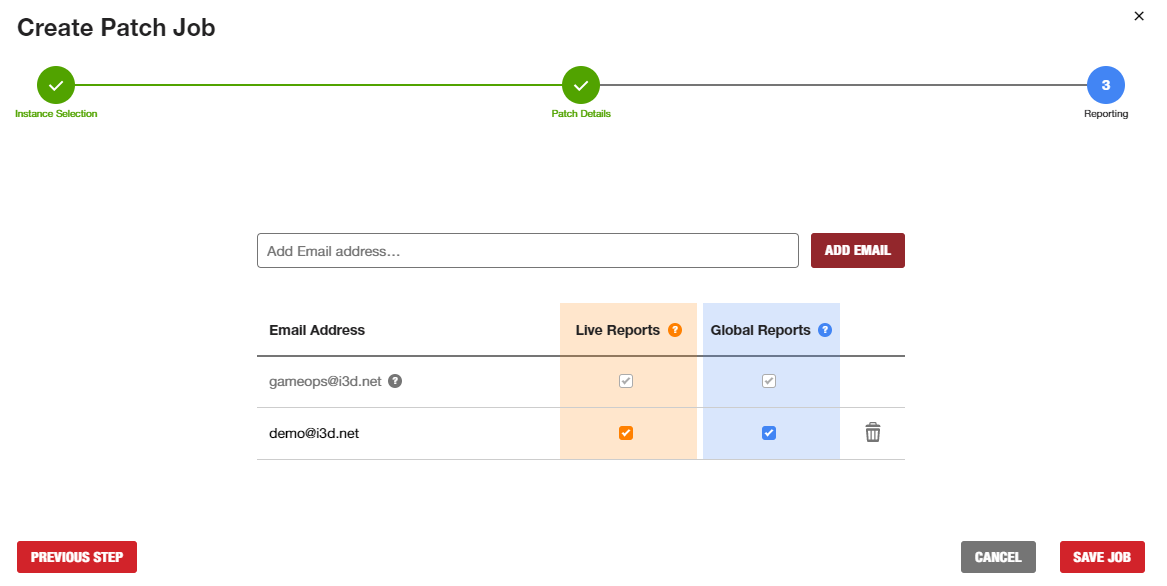
- add any email addresses that must receive reporting emails
- indicate per address which reports they should receive
Creating a Forced Deployment Patch Job via the API
The same idea applies for creating a Patch Job via the API, as they do when creating them via the UI. You must pass the ID of the Deployment Environment within which you want to perform the patch, then define the Application ID, old Application Build ID and the Fleet ID(s) to create a selection of running Application Instances to update.
HTTP request
Request body
{
    "deploymentEnvironmentId": "3142271489856081055",
    "applicationId": "1623002410560965042",
    "applicationBuild": [
        {
            "newApplicationBuildId": "5282598825997197979",
            "oldApplicationBuildId": "7890311781321404840"
        }
    ],
    "fleet": [
        {
            "fleetId":"2329870940606592031"
        }
    ],
    "patchJobName": "Patch to build B",
    "patchJobMethodId": 1,
    "stopMethodId": 9,
    "stopMethodTimeout": 900,
    "comments": "",
    "schedulerStartTime": 1593072000,
    "email": [
        {
            "email": "vic@vvlaardingen.nl",
            "progressReport": 1,
            "resultReport":1
        }
    ]
}
Response body
[
    {
        "id":"6732998643443795030",
        "deploymentEnvironmentId":"3142271489856081055",
        "applicationId":"1623002410560965042",
        "patchJobMethodId":1,
        "patchJobMethod":"Forced deployment",
        "patchJobName":"Patch to build B",
        "status":1,
        "stopMethodId":9,
        "stopMethodName":"Arcus",
        "stopMethodTimeout":900,
        "comments":"",
        "schedulerStartTime":1593072000,
        "patchJobStartTime":0,
        "patchJobOverallProgress":null,
        "applicationBuild":[
            {
                "id":"2590904313587865362",
                "oldApplicationBuildId":"7890311781321404840",
                "newApplicationBuildId":"5282598825997197979"
            }
        ],
        "fleet":[
            {
                "id":"8956749585727486343",
                "fleetId":"2329870940606592031"
            }
        ],
        "email":[
            {
                "id":"3804546952601287130",
                "email":"vic@vvlaardingen.nl",
                "progressReport":1,
                "resultReport":1,
                "createdAt":1592915978,
                "changedAt":0
            }
        ],
        "createdAt":1592915978,
        "changedAt":0,
        "finishedAt":0,
        "isRevertable":1
    }
]
Upon successful submission of a new Patch Job, you can find it in your Patch Job overview: GET /v3/patchJob.
Creating a Forced Deployment Patch Job manually
You can perform all of the above manually if you wish, bypassing our automated systems. For more details on how to do this, please see the Forced Deployment - Manually chapter. Note that you will not receive any live-reporting emails then.