Define your application and create your application build
Once you have registered your build origin server from the previous step, you can now define your application. You can define your application in the following four types:
- A Game server
- A Utility / sidecar
- A Dependency installer
- A Dependency uninstaller
You can do this directly in the Game hosting dashboard. Here are the steps to follow below.
Enter your application details
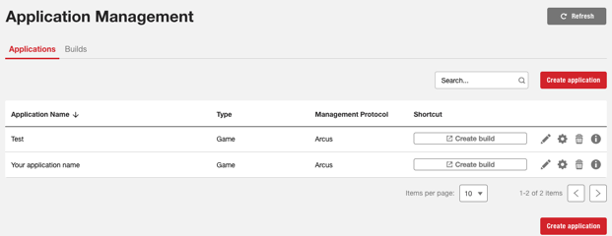
- Go to Game Hosting > Applications.
- In the Application Management page, click Create application.
-
In the Create Application window, enter the following fields:
-
Application Name.
- (Optional fields) Enter Description, Developer Name, Publisher Name, and Website URL.
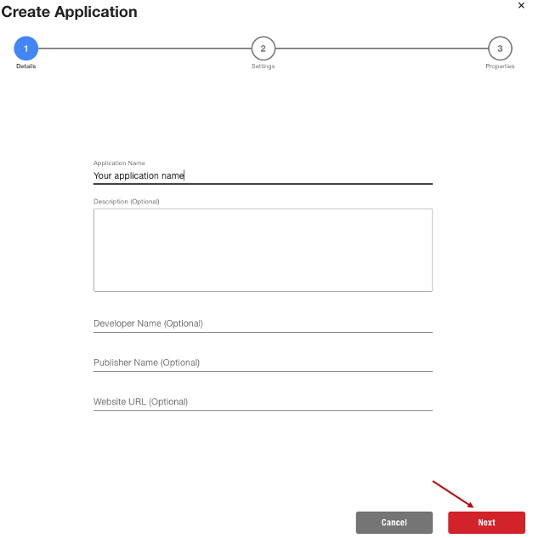
- Click Next. You will now enter your application settings.
Enter your application settings
For this example, we will demonstrate how to create a game application.
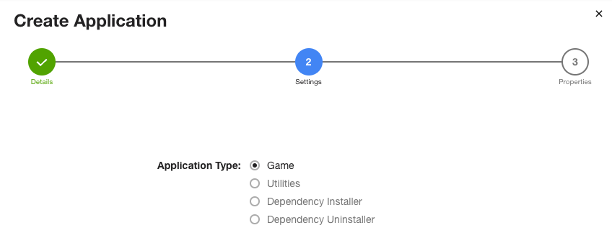
- Select your Application Type. You can select from the following types: Game, Utilities, Dependency Installer, or Dependency Uninstaller.
- Select your Management Protocol. You can select from the following protocols: None, A2S, and Arcus. This only applies when your Application Type is Game.

- Select your Operating System Group that will run on the machine and be used for the stop method. You can select either Windows or Linux.
- Select your Default Stop Method. The stop method that will be used on restart or destroy of an application instance. The default is Hard kill. Depending on your Management Protocol and Operating System Group, you will have a defined selection to choose from.

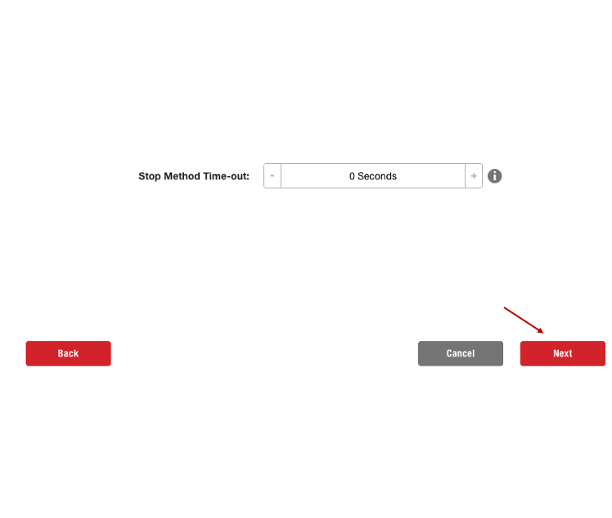
- Select the Stop Method Time-out. This ensures that there are no active players on the instances that are scaled down by the scaler. The default is 0 Seconds (no timeout).
- Click Next. To create your application properties, follow the next steps below.
Create your application properties
Here you can customize how you want your application to send and receive information. For example, you can define that your application uses a certain network port, or requires a password or multiple ports, and a preset password, or have the system generate a unique password for each ApplicationInstance.
- To add a new Application property, click + Add.
- Select Type from the drop down list.
- Enter the Key.
- Enter the Value.
- Click the floppy disc icon to save your newly created application property.
- Click Create.
- Click Save.
- Follow the step below to create your application build.
For more explanation about private/public network port properties and private/public network port range properties, see our ApplicationProperty overview documentation
Create your application build (Build details)
- Go to Game Hosting > Applications.
- Click the Builds tab.
- Click Create build.
- On the Create an Application Build window, enter the Application Build Name.
- (Optional) Select the Instance does ready callback check box if you want the platform to be informed when it's done initializing and ready to accept players.
- Select the Application, CDN Account, and File from the drop down list.
- Click Next.
Create your application build (Settings)
- Select your Operating System from the drop down list.
- Enter your Application Build Executable.
- By default, the Run as root user is check box is selected.
- Enter your Version and Startup Parameters.
- Select your Host Capacity Template from the drop down list.
- Click Next.
Create your application build (Labels and Build properties)
- Click + Add to set up your labels.
- Enter your Key and Value
- Click the floppy disc icon to save.
- Click Next.
- You will see your Application build properties displayed here. To edit, click the pencil icon.
- Click Save.